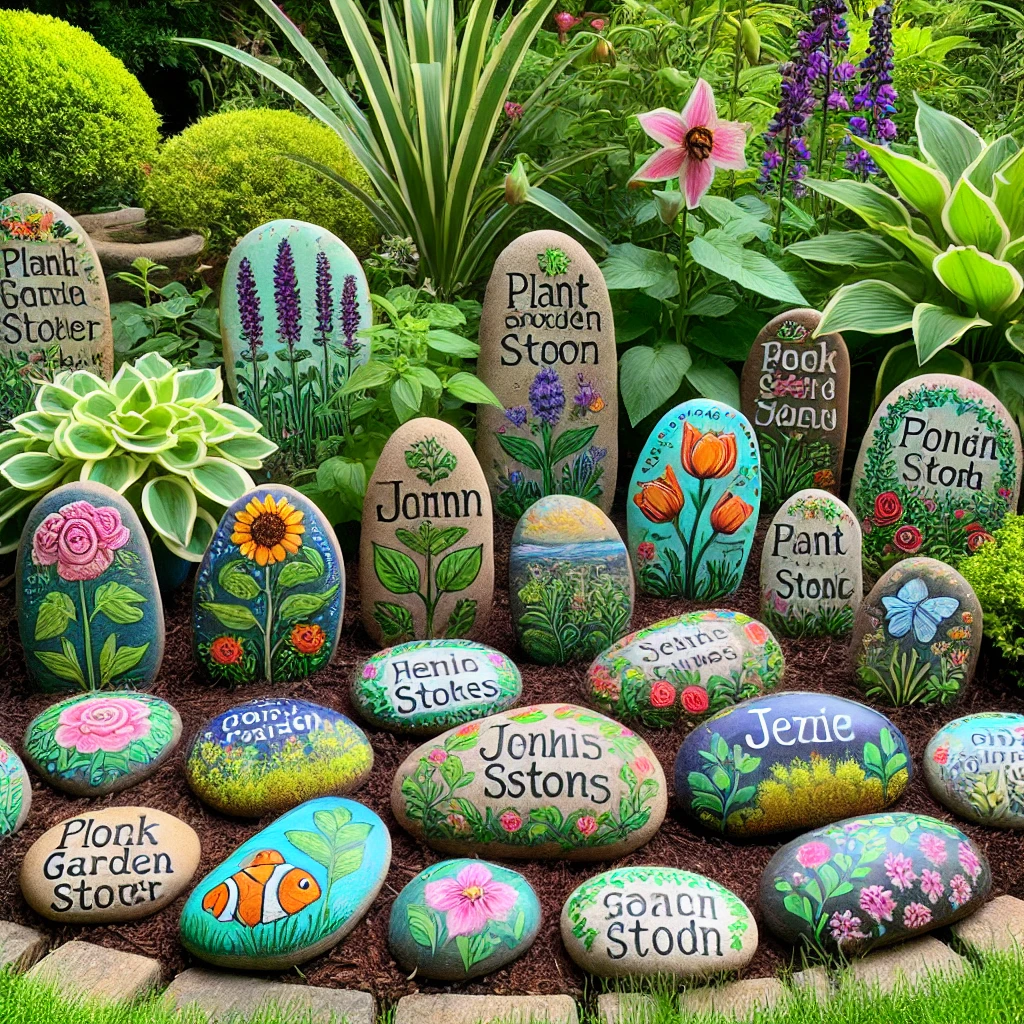
DIY Painted Rock Garden Markers: A Creative and Practical Gardening Project
If you’re looking for a fun, creative, and eco-friendly way to label your plants and herbs, DIY painted rock garden markers are the perfect solution. Not only do they add a decorative touch to your garden, but they also help keep track of your plants in a charming and personalized way.
In this comprehensive guide, we’ll explore how to make painted rock garden markers step-by-step, discuss the best materials to use, share creative design ideas, and provide tips to ensure your markers last for years.
Why Choose Painted Rock Garden Markers?
Before diving into the DIY process, let’s explore why rock garden markers are a fantastic addition to your garden:
🌿 1. Eco-Friendly & Sustainable
Instead of using plastic plant labels that can break or fade, painted rocks are a natural and long-lasting alternative.
🎨 2. Fully Customizable
You can design your garden markers however you like—from simple plant names to fun artistic illustrations.
💰 3. Budget-Friendly
Smooth rocks are readily available for free or at minimal cost, and acrylic paints are inexpensive and long-lasting.
☀ 4. Weather-Resistant & Durable
With a good sealant coat, painted rock markers can withstand rain, sun, and wind, making them perfect for outdoor gardens.
🏡 5. Perfect for All Ages
This DIY project is great for kids and adults alike, making it an excellent activity for families, schools, and community gardens.
Materials Needed
Before you start, gather the following supplies:
✔ Smooth Rocks – Preferably flat and round, so they are easy to paint on. River rocks work best.
✔ Acrylic Paints – Use vibrant, weather-resistant colors for better visibility.
✔ Paintbrushes – Fine-tipped brushes for detailed lettering and designs.
✔ Clear Sealant Spray – To protect the paint from fading and weather damage.
✔ Permanent Marker or Paint Pens – Useful for writing plant names neatly.
✔ Damp Cloth – To wipe the rocks before painting.
Step-by-Step Guide to Making DIY Painted Rock Garden Markers
Step 1: Wash and Dry the Rocks

- Rinse the rocks thoroughly under running water to remove dirt and debris.
- If needed, scrub them with a brush to ensure a clean surface for painting.
- Let them air dry completely before moving to the next step.
Step 2: Paint the Rock Base Coat

- Apply a base coat of acrylic paint in a solid color (optional).
- Allow the first layer to dry before applying a second coat for better coverage.
Step 3: Add Plant Names or Designs

- Using thin paintbrushes, paint pens, or permanent markers, carefully write the name of the plant or herb on each rock.
- You can also add fun illustrations like leaves, vegetables, or flowers for a decorative touch.
- Allow the paint to dry completely before sealing.
Step 4: Seal the Painted Rocks

- Once the paint is fully dry, spray the rocks with a clear acrylic sealant.
- Apply 2-3 coats, letting each coat dry before adding the next.
- This step ensures waterproofing and UV protection, keeping your markers looking fresh.
Step 5: Place the Markers in Your Garden
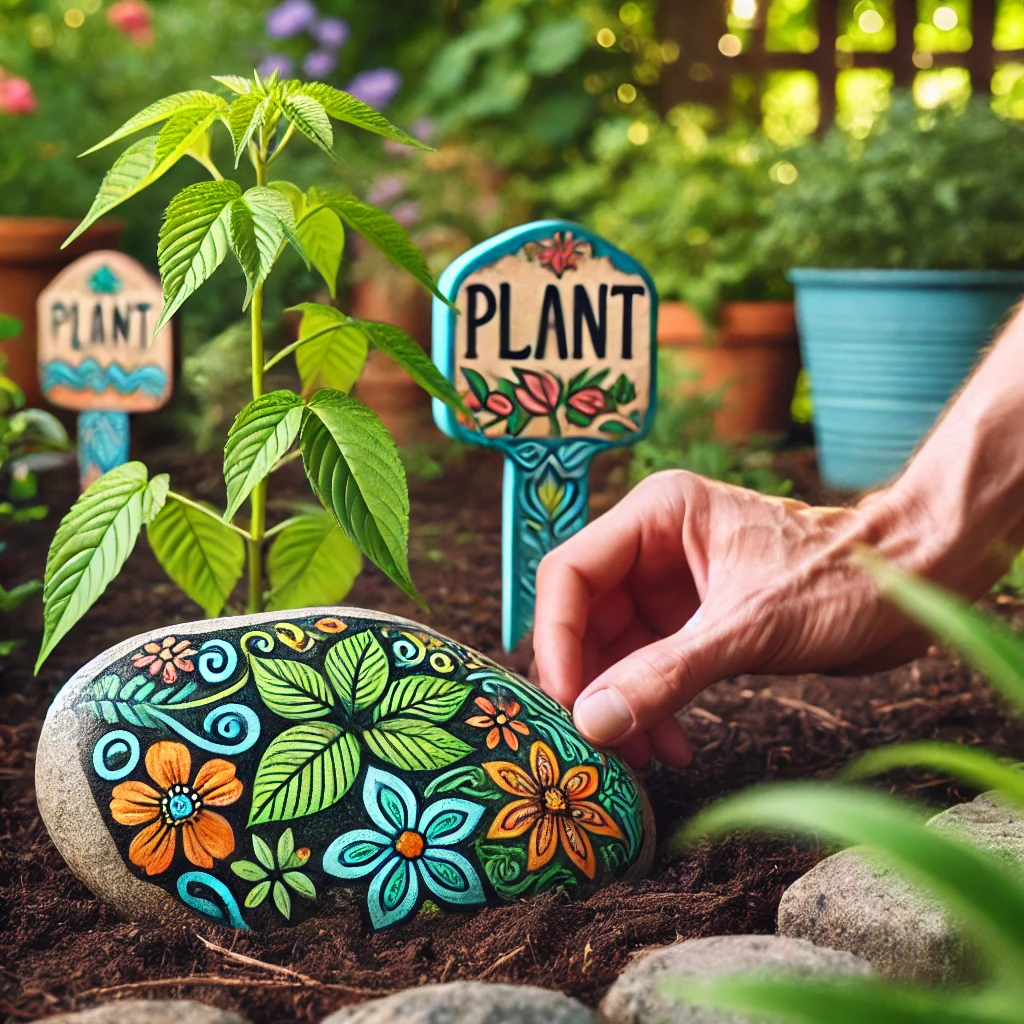
- Find the perfect spot next to your herbs, vegetables, or flowers.
- Place the rocks firmly in the soil so they stay in place.
Creative Design Ideas for Painted Rock Garden Markers
Want to make your markers stand out? Try these unique design ideas:
🎨 1. Color-Coded Rocks
- Use different colors to categorize plant types:
- Green for herbs
- Red for vegetables
- Yellow for flowers
🖌 2. Chalkboard-Style Rocks
- Paint the rocks black and write in white paint pen to mimic a chalkboard look.
🐞 3. Themed Garden Markers
- Bug-Themed Rocks: Paint ladybugs, bees, or caterpillars to make them extra fun.
- Fairy Garden Style: Use pastel colors and glitter for a whimsical touch.
✍ 4. Handwritten vs. Stamped Lettering
- For a neat and uniform look, use stencils or rubber stamps instead of freehand writing.
🌿 5. Glow-in-the-Dark Rocks
- Use glow-in-the-dark acrylic paint to create markers that shine at night!
Best Places to Use Painted Rock Garden Markers
These markers are not just for gardens! Here are other creative ways to use them:
✔ Outdoor Gardens & Raised Beds – Keep track of your vegetables and herbs.
✔ Indoor Herb Planters – Label small potted herbs on kitchen windowsills.
✔ Community Gardens – Help organize shared spaces with easy-to-read markers.
✔ Gifts for Gardeners – Handmade markers make thoughtful presents.
✔ Educational Gardening Projects – Great for kids’ gardening activities in schools.
Tips for Long-Lasting Painted Rock Garden Markers
Follow these pro tips to make your markers last:
✔ Use high-quality acrylic paints – They are weather-resistant and won’t fade quickly.
✔ Seal properly – A good coat of clear sealant ensures waterproofing.
✔ Choose durable rocks – Smooth, flat river rocks work best.
✔ Place them in shaded areas – Direct sunlight can fade colors faster.
Common Mistakes & How to Avoid Them
❌ 1. Paint Peeling Over Time
✅ Solution: Always clean the rock surface thoroughly before painting and apply a sealant afterward.
❌ 2. Fading Colors from Sunlight
✅ Solution: Use UV-protective clear spray sealant to prevent sun damage.
❌ 3. Writing Smudging When Sealing
✅ Solution: Let the paint dry completely before applying sealant spray.
Final Thoughts
DIY painted rock garden markers are a fun, practical, and eco-friendly way to personalize your garden. They make plant identification easier while adding a unique decorative element to your outdoor space.
Why not try making some today? Share your painted rock designs in the comments, and let us know how you use them in your garden! 🌱🎨